In this tutorial, I will explain to Self Host your WCF Service in a Console Application step by step. In order to host a WCF Service, you need a managed process, a ServiceHost instance and an endpoint configured forWCF Service. You can host aWCF Service in following different possible ways:
1. Hosting in a Managed Application/ Self Hosting
- Console Application
- Windows/WPF Application
- Windows Service
2. Hosting on Web Server
- IIS 6.0 (ASP.NET Application supports only HTTP)
- Windows Process Activation Service (WAS) i.e. IIS 7.0 supports HTTP, TCP, NamedPipes, MSMQ

Self Hosting a WCF Service in a console application is comparatively easy as well as flexible because we can achieve the purpose by writing few lines of code.
Step 1
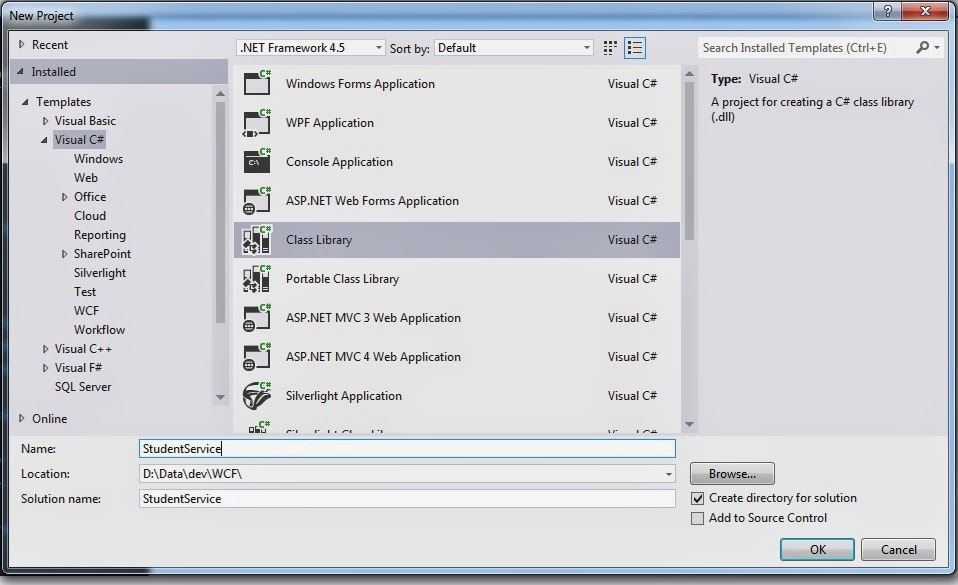
Let’s first Create a Simple WCF Service i.e. a StudentService and then host in a Console application. StudentService having service operation GetStudentInfo that takes StudentId as parameter and returns student name. Open Visual Studio and Create a new Class Library Project, name it as “StudentService” and press “OK” button.
Then, right click on project and Add a new “WCF Service” to this Class Library Project.
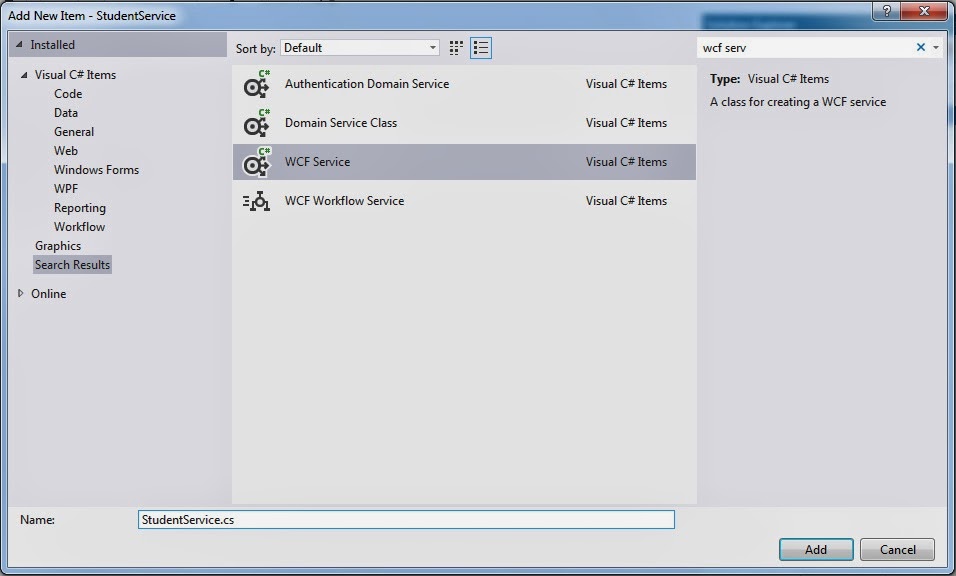
It will add Service Contract (IStudentService) and it’s implementation class (StudentService) to class library project. Also, it will add a reference to System.ServiceModel.
Code for IStudentService interface will be as follows:
[ServiceContract] public interface IStudentService
{
[OperationContract]
string GetStudentInfo(int studentId);
}
And following is the code for StudentService implementation class:
public class StudentService : IStudentService
{
public string GetStudentInfo(int studentId)
{
string studentName = string.Empty;
switch (studentId)
{
case 1:
{
studentName = “Your Name”;
break;
}
case 2:
{
studentName = “Your Name”;
break;
}
default:
{
studentName = “No student found”;
break;
}
}
return studentName;
}
}
Step 2
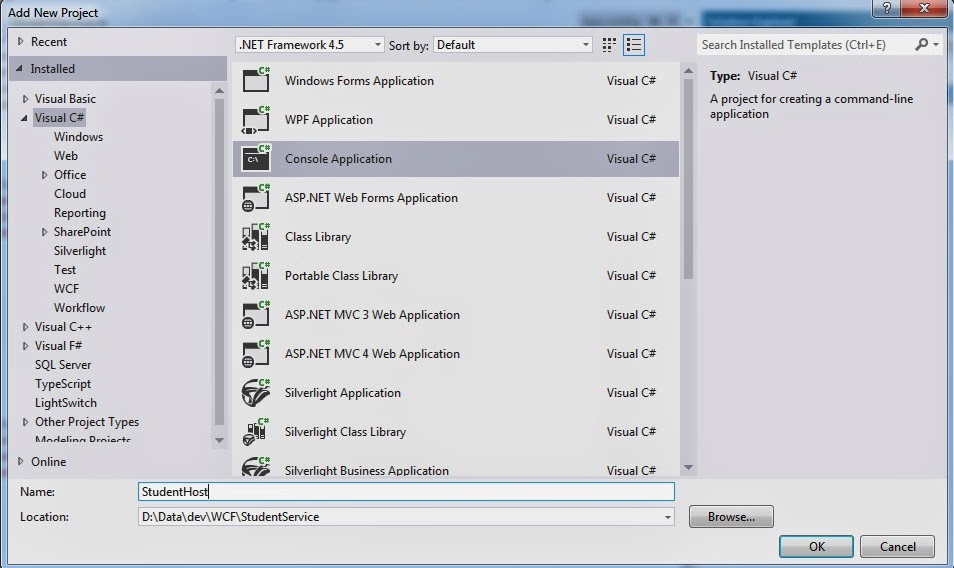
In order to host this service in Console application, let’s add a new console application project “StudentHost” to this solution.
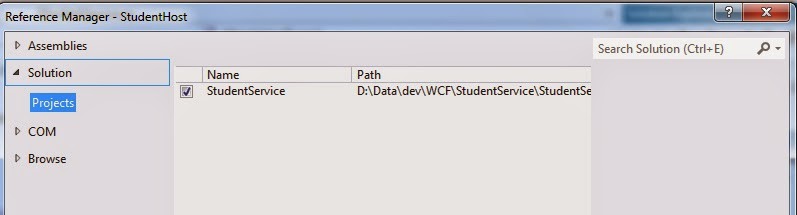
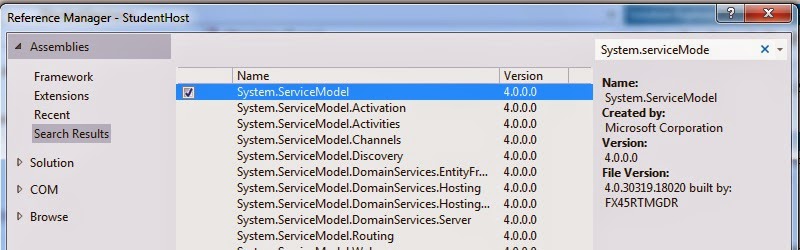
Your console application will have reference to:
- StudentService class library
- System.ServiceModel.
At the start of this WCF Tutorial, we discuss that hosting a WCF service requires a Managed Process (i.e. console application), Service Host (an instance of ServiceHost class) and one or more Service Endpoints. Detailed implementation of Student host application is as follows:
class Program
{
static void Main(string[] args)
{
ServiceHost studentServiceHost = null;
try
{
//Base Address for StudentService
Uri httpBaseAddress = new Uri(“http://localhost:4321/StudentService”);
//Instantiate ServiceHost
studentServiceHost = new ServiceHost(typeof(StudentService.StudentService),
httpBaseAddress);
//Add Endpoint to Host
studentServiceHost.AddServiceEndpoint(typeof(StudentService.IStudentService),
new WSHttpBinding(), “”);
//Metadata Exchange
ServiceMetadataBehavior serviceBehavior = new ServiceMetadataBehavior();
serviceBehavior.HttpGetEnabled = true;
studentServiceHost.Description.Behaviors.Add(serviceBehavior);
//Open
studentServiceHost.Open();
Console.WriteLine(“Service is live now at : {0}”, httpBaseAddress);
Console.ReadKey();
}
catch (Exception ex)
{
studentServiceHost = null;
Console.WriteLine(“There is an issue with StudentService” + ex.Message);
}
}
}
Now, simply build the console application and run it after setting as startup project. You will see the following screen that shows our self-hosted WCF Service is running.

HostForLIFE.eu WCF with Free ASP.NET Hosting
Try our WCF with Free ASP.NET Hosting today and your account will be setup soon! You can also take advantage of our Windows & ASP.NET Hosting support with Unlimited Domain, Unlimited Bandwidth, Unlimited Disk Space, etc. You will not be charged a cent for trying our service for the next 3 days. Once your trial period is complete, you decide whether you'd like to continue.
